The Smart String system drops right into your engine bay. And because the system is hung off your car, you can roll it back and forth to settle the suspension while making adjustments, a very cool feature.

As a racecar driver, I have learned to hate alignment shops. When I have told shop technicians I want 3.5 degrees of negative camber, they often have argued with me that my settings are incorrect per their manual. I explain to them that I’m not trying to get 50,000 miles out of a set of tires. I am trying to win races.

Different alignment machines use different data — degrees versus inches — so when I say I want an eighth-inch of toe-out, the technician has no idea what that means in degrees. Other machines don’t provide data at all. They just have red and green lights to get the car back to manufacturer-recommended alignment specs, which differ greatly from racing specs. So I have decided to fire all of them.

I have replaced them with an alignment system called Craig Watkins’s Smart Strings and Smart Camber. The tools are inexpensive, easy to understand, and can be used in your garage, carport or racetrack paddock. Why should we use the Smart String system? Well, Watkins worked as chief engineer for Johannes van Overbeek and Flying Lizard Motorsports, who raced at places like Le Mans and won the 24 Hours of Daytona. Yes, they used Smart Strings to align their Porsche racecars. I’m convinced.

The Smart Strings system is easy to set up for different vehicles. The small adjustment knobs allow you to make the system wider or taller to fit your vehicle perfectly. Set the system up so the vertical square tubes are 90 degrees to the ground/vehicle and you are ready for the next step.

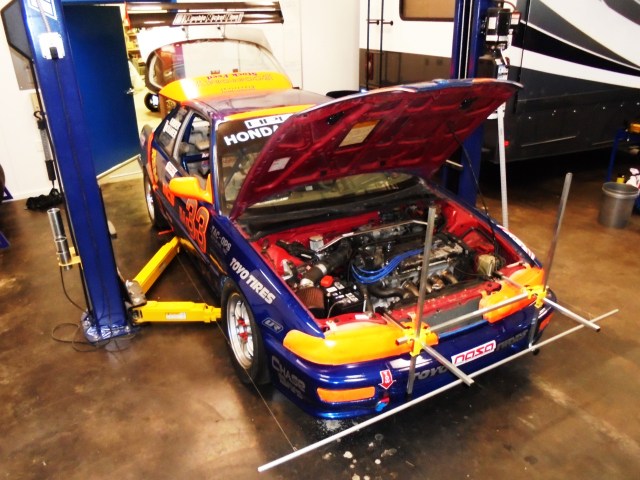
The basic premise is to use strings to create a perfect box around your car and to take measurements from that box. What’s cool about the Smart String system is that this “box” hangs from your car at the correct height —the center of your car’s axles — and you can push the car around to settle the suspension without messing up the string box for repeatable measurements.

On one end of the car, tie a loop in your string to easily hang it off of one end of the Smart Strings system. Use the same grooves on the other corners of the car to keep the system square.

Additionally, a key difference between using the Smart Strings system versus toe plates is thrust angle adjustment. Toe plates only measure toe between two wheels at a time — front or rear — which means the measurements to the true center of the vehicle relative to each other aren’t known. The box created by Smart Strings gives you a plane to measure the front and rear wheels against at the same time, ensuring your car will track correctly. If you are unfamiliar with what the thrust angle is or you think toe is something you have on your foot, visit https://www.smartracingproducts.com/smartstrings and download the owner’s manual for the Smart Strings, which provides an easy-to-understand lesson on vehicle alignment and nomenclature.

On the tied end, we added a small fishing weight to the string to keep things nice and taught. I have seen professional teams use a fishing reel and let the reel just hang below the bar, and when they were done with their alignment, they just reel in the line to store the string.

The first thing to remember is order of operations: First, set your ride height, adjust your caster, your camber, and then your toe. While making alignment changes, especially for toe, it is important to have your steering wheel straight. This can be done by locking the steering wheel into place with a special tool, or by having children. I make my kids sit in the driver seat for hours holding the wheel straight while sitting on weights to replicate my body mass in the driver’s seat. Yup, father of the year.

Instead of using a floppy tape measure, we picked up an aluminum yard stick to reliably measure ride height of the car and the height of the Smart String system. First measure the height of the center of your wheels. In the case of our Honda Challenge car it was 11.5 inches. Then adjust the height of your string bars to the same height.

To measure camber, hold the Smart Camber gauge against the wheel and read the digital display, which is in degrees. Adjust your camber until you get the number you are looking for. Easy stuff. The digital display makes reading the measurement easier and the tool allows for zeroing on a nonlevel surface, such as any paddock asphalt, at any track, anywhere. This allows you to make accurate adjustments on an imperfect surface. Bubble levels don’t have that feature.

To build a perfectly square rectangle around the car as a reference for measurements, we checked the distance from the center of the wheel to the string and then moved the string poles until the string on each side of the car is equidistant from the wheels on both sides. Most vehicles have different track widths front to back, but as long as the distance from the string to the front wheels, and the same distance at rear wheels is the same, all will work out.
To build a perfectly square rectangle around the car as a reference for measurements, we checked the distance from the center of the wheel to the string and then moved the string poles until the string on each side of the car is equidistant from the wheels on both sides. Most vehicles have different track widths front to back, which means the distance from the string to a front wheel will probably be different from the string to the rear wheel. That is okay, and normal. All that matters is that the distance from the string to the center of the left front wheel is the same as the distance from the string to the center of the right front wheel. And for the rear of the car those distances will probably be different, but as long as the distance from the string to the center of the left rear wheel is the same as the distance from the string to the center of the right rear wheel you are good to go. Pro tip: Write these measurements down on an inner fender under the hood or the rear hatch for quick reference the next time you set the car up.

To check caster, all you need to do is measure your camber using the Smart Camber tool with the front wheels straight, then turn the wheels to 20 degrees left and measure your camber again. You can determine the 20 degrees of turning using a template provided with the tool to put lines on the ground. Write down the new camber measurement. Turn the steering wheel back to center and then turn the front wheels 20 degrees right and measure your camber again. Write down that measurement. The change in camber from the three positions indicates the imaginary line the front spindles are pivoting on. Adding/subtracting the different camber measurements from each other will determine positive or negative caster as well as the total amount of caster. If this is confusing, go to https://www.smartracingproducts.com/smartcamber and download the owner’s manual for the Smart Camber gauge to read Craig Watkins explanation of it. Yes, he’s an engineer, but he’s a racer, too, so he makes the stuff easy to understand.

Once your Smart String system is set up, with the height of the strings at the center of the wheels and the poles centered on the car, you are ready to align your car. You can roll the car back and forth to settle the suspension, which will not affect the Smart String system one bit.

We have played around with both tools inside garages and at the track and found them both super easy to use. We came up with a couple of little tricks, like marking the wheel at 12 o’clock and 6 o’clock with adhesive signature tabs, for repeatable camber/caster measurements. We also use small fishing weights at the end of our strings to keep the strings tight for accurate measurements. The best part about the tools is that I never have to go back to an alignment shop again.

To find toe, measure the leading edge of the rim and compare that measurement to that of the trailing edge of the rim. Before making any toe adjustments, remember to straighten the steering wheel! We do our measurements in millimeters because everybody knows fractions are hard.
The first small metal ruler we used to measure toe was problematic because it had inches on one side and millimeters on the other. We found this millimeter-only ruler, where both sides of the ruler measure in millimeters, was much easier to use.
When the system is assembled, it seems a bit cumbersome, but the components break down into an easy-to-carry case to take to the track.
Here you can see the lower attachment on the Smart Camber gauge, which makes it a hands-free tool, allowing you to keep the gauge on the wheel while you make camber adjustments.
Finding a perfectly level surface in a racetrack paddock is nearly impossible. This tool allows you to zero the gauge to any surface you are parked on prior to measuring the camber on the car.
To ensure we were always using the same diameter we used a plumb bob and sticky tabs to mark the top and bottom of the wheel, at 12 o’clock and 6 o’clock respectively. Then we knew exactly where to place our gauge each time.
The Smart Camber tool has a hands-free three-post option, but we found the two-post option was quicker and easier to use, especially after we took the time to place small adhesive tabs to mark the wheel for repeatable measurements.
The Smart Camber gauge comes with handy guides for zeroing the gauge and doing caster setups. Keep these! You will refer to them many times. The caster layout template will help you draw lines on your shop floor to measure caster.
When you look at the Smart Strings system, you think, “I can make that myself!” Sure, you could, but at just a little over $400 for Smart Strings, you can’t beat letting somebody else do the hard work and design.


To read more from Rob Krider, or to contact him, go to www.robkrider.com.

Image courtesy of Rob Krider

2 COMMENTS

Join the Discussion