This is the final product of adding stripes and numbers to a Corvette Z06. The graphics on this car are a combination of sponsor and contingency stickers, professional two-color die-cut stickers from Figstone Graphics and homemade stripes from leftover vinyl scraps.
If you want to be a pro, or if you want to act like a pro, then you need to look like a pro. Using blue painter’s tape to cobble together a car number or class designation on your doors will never make you look like a pro. Have you seen any teams at Le Mans using that method for a car number? Nope, and you shouldn’t use masking tape either, especially when making a car number or class identifier isn’t complicated or expensive.
We’ve all seen this at NASA events: a great car with a terrible set of numbers made from blue masking tape stuck to the door. You can avoid this with about 15 minutes worth of work and about $10 worth of materials.
I’m not saying you have to spend a few hundred dollars on custom graphics every time you go to the track. I understand for a lot of Time Trial drivers, these racecars are the same vehicles that get you to work on Monday — as long as there are no really bad offs on Sunday, of course. This month we will show you a way to build a sharp looking car number with nothing more than a piece of blank vinyl, a knife and your home computer.
All you need to make a professional looking sticker is a word processor, a printer, a box cutter and some vinyl. What the final outcome looks like is left to your imagination and cutting skills.
If you go to a sign shop and ask them to print you two door numbers, you will probably get dragged into “design costs” and “material costs” and a lot of hassles you don’t really need for a simple No. 3 on your doors. Skip all of that nonsense and tell them you only want to buy the blank stock vinyl. Choose a color you like that contrasts with your car’s paint. A lot of times the sign shop will sell you scrap they can’t use and you can be out of there for less than $10. Don’t tell them what you want the material for because they will create a “special” price for a racecar driver. I always tell them my kids need the vinyl for a school project they’re working on. It works every time, and occasionally they just give me the scraps.
Go home and play with Microsoft Word and find your favorite font to print out your car number and class. Do not use comic sans! Don’t ask why. Just don’t do it. We are trying to make you look like a professional here, so leave the wacky fonts for use at preschools. Use a bold, thick font. Read your class rules and regulations to ensure your numbers are the correct height and stroke. Make your font size something ridiculous like 700 point because you’re going to use the printed page to cut your number actual size out of the vinyl stock.
Once you have your number, using your favorite font printed out, tape it to the piece of vinyl you got from the sign shop. Then use an X-acto knife or scissors to trim the vinyl. Once you’re done trimming, you will have a professional and decent looking number to place on your car. Slap that sucker on and go fast! This will be easy because you just gained five horsepower from the sticker.
Once you have your number printed out, tape it to the vinyl and to a bench so it won’t move as you cut out the number. Keeping the paper on the same location of the vinyl is paramount for the finished product.You can use a box cutter, a knife, a razor blade, an X-acto knife, or scissors to cut along the printed font line to get your new number sticker.Here you can see our homemade number three. If you looked really closely you may see a rough edge or two. But at 50 mph from 50 feet away you would never be able to discern this homemade sticker from a more expensive die-cut sticker.Here is the final shot of our homemade numbers on the car. This certainly looks a lot more professional than blue masking tape. The whole process from printing the numbers in Word to putting them on the car took 15 minutes.
For those of you who want to really add some fake horsepower — meaning lots of stickers — then buy more of the vinyl material and add some stripes or other graphic elements to make your car stand out at the track. Use soapy water and a squeegee to lay the vinyl down flat. Multiple colors can really help the graphics contrast from the color of the car. Have fun with it. Vinyl is cheap, and with a little patience and creativity, you can transform your car from grocery getter to trophy getter.
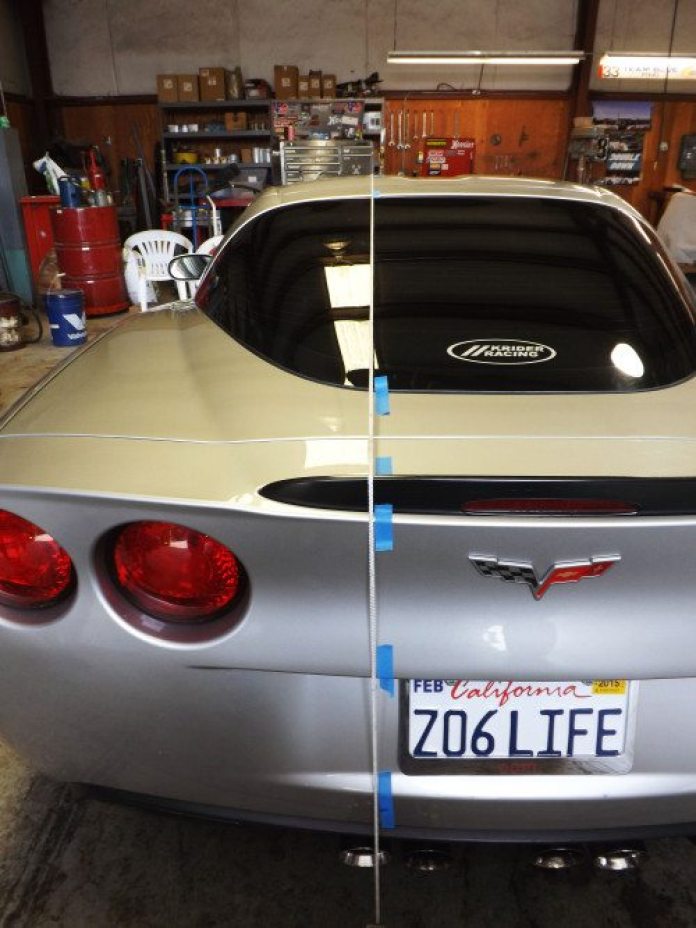
I keep extras of the same color vinyl we use for class designations in the race trailer. You never know when you may bump up or down a class or maybe jump into an enduro race. Having the vinyl with you will keep you from using the dreaded blue masking tape to make an E3 on the side of your car.Vinyl is thin and stretchy so it doesn’t go on and off and back on too well without deforming. To give you some working time with the placement of a sticker, use some soapy water and spray it on the surface prior to placing the sticker. We use a spray manufactured for placing window tint from AutoZone. It comes in a spray bottle and is easy to use.For a two-tone sticker, we apply the black base color first and then the red top color second. It would be much harder to cut a black outline to go around the red sticker, so instead we just made the black sticker larger and then placed the red sticker on top.Occasionally you will get bubbles under the vinyl that you can’t seem to squeegee out. This isn’t a problem. Use a sharp razor blade and cut the smallest hole in the material at the bubble. This hole will let the air out and you can squeegee down the material making the bubble disappear. Once the vinyl lays down, the small cut you made won’t be visible.The corvette Z06 is a cool car, but on the racetrack without any decals, it looks plain. We wanted the Corvette to stand out a bit, so we decided to add some stripes to make the car pop.Before we went crazy and cut a lot of vinyl material for stripes, we used small test stripes to ensure we liked the colors, the thickness and the position of the new graphics.To put a long stripe on a car and ensure that it is actually straight, we used string and masking tape to designate where we should lay the vinyl down. The Corvette doesn’t have a single straight line on it, so putting a straight line down the middle of it was a challenge. Trust your eye to place the stripe. Oftentimes your eye is actually better than a measuring tape. If it looks good to you, then it looks good, regardless of the measurement.The single piece of string was placed along the entire length of the Corvette to estimate and visualize if the stripe would look good. We used two jack stands to weigh down the ends of the string so it was straight and taut on the car. Then we traced the string location with masking tape to guide the vinyl.With our red stripe completed, we placed small pieces of masking tape adjacent to the stripe to create a gap for the next stripe to be placed on the car. This way the black stripe would follow the same lines as the red one.