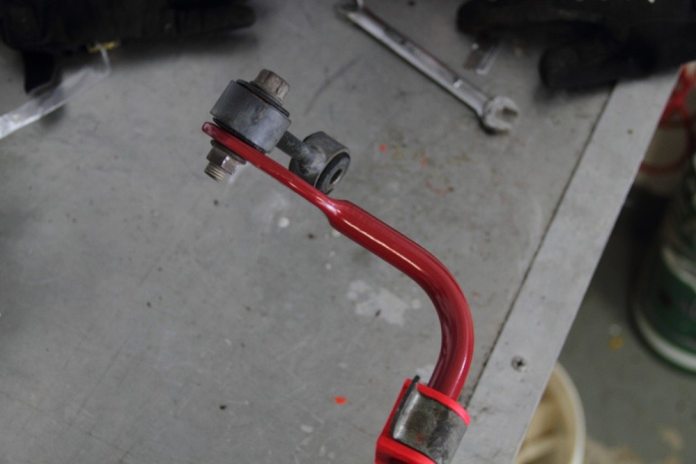
Bolt everything back into place, including the end link that’s missing from this photo and tighten all the fasteners. Remember to retorque the lower control arm bolt you loosened earlier.
One of the great things about Spec Miata is its simplicity, and it starts with the suspension system.
You don’t need to be an expert at spring or shock rates to get the right suspension system. You just sign on with Mazdaspeed Motorsports Development and you order a kit. One part number covers all the suspension bits you need to race in the class.
True, the early cars need the shock hats found on later models and everyone benefits from adjustable sway bar end-link kits, but the process couldn’t be simpler. However, don’t let the simplicity lull you into thinking it’s unsophisticated. The Miata is a brilliant little car, which is something you learn the first time you drive one, and come to appreciate on a deeper level after you have turned a wrench or two on it.
All the right ingredients are present and all components are fairly easy to get to. Independent rear suspension with coil-over shocks for planted cornering. Double wishbone suspension front and rear for camber profiles superior to strut cars. And let’s not forget curb weight. In Spec Miata trim, the car weighs in naturally at about 2,100 pounds.
Those parts add up to something greater than their sum, and they capitalize on an arguably rudimentary suspension upgrade. Installation is pretty easy, too, but after having built two of these cars, we’ve learned a thing or two along the way. If you are planning to build a Spec Miata, we hope this helps.
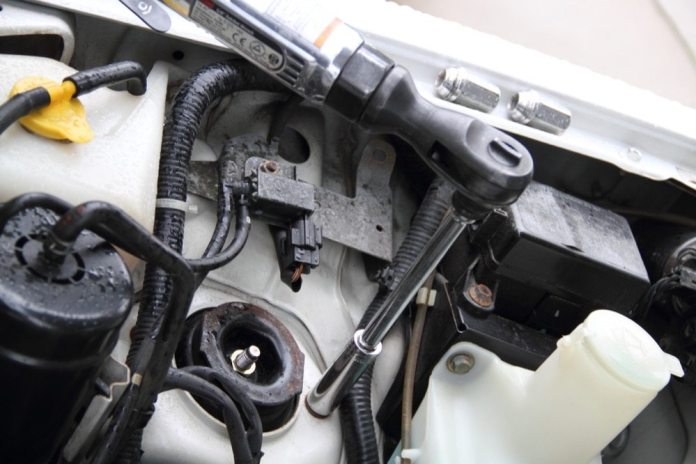
Rear shocks mount through the trunk floor. The right side is easy to get at, but the left is a hidden by a metal panel that protects the fuel hoses from trunk luggage. Remove the panel and hoses to make access easier. You might use this opportunity to remove the flapper from the fuel filler neck.Rear shocks mount through the trunk floor. The right side is easy to get at, but the left is a hidden by a metal panel that protects the fuel hoses from trunk luggage. Remove the panel and hoses to make access easier. You might use this opportunity to remove the flapper from the fuel filler neck.The rear shock won’t come out unless you detach the upper control arm from the knuckle. Loosen the big bolt that joins the lower arm to the knuckle and detach the sway bar link so everything moves more freely. Remember to tighten the big bolt after the new shock is installed. Oh, and call Mazda and get spare lower bolts, too. They are the first thing to bend if you hit something.An impact wrench makes this job much easier. Take off the bottom shock bolt.With everything out, it’s time to install the new spec shock and spring.Be sure to install the clear plastic film that comes on the shocks from the factory. I can’t say exactly what purpose it serves, but it was put there by people smarter than me, so I always make sure it’s included.Hang the end links off the new bar before you bolt it on. This is the stock link. The adjustable one is on the other side. Be sure to use the supplied grease on the inside of the bushing so the bar moves freely after it’s clamped down.Now, on to the front suspension. You’ll need a 21 mm box wrench, a 21 mm socket and some muscle. If your bolts and nuts are rusty, shoot them a few times with penetrating lubricant a day or two beforehand. WD-40 works fine, but I prefer Prolong’s penetrating spray lube.When the nut comes off, you’ll slide the bolt forward through the bracket that holds the front sway bar clamps. Note that the front plastic under tray already has been removed, but I haven’t yet removed the air conditioning plumbing.With the upper control arm bolt removed, you can remove the two upper mounting nuts.Once the upper and lower mounting bolts are removed, you can pull the shock and control arm out far enough to remove it from the car.The new unit goes on using the reverse process. However, be sure you slip the shock through the opening in the upper control arm before you screw everything back together because it is possible to do all that with the upper control arm out of place. Not that I did that.Lubricate the bushing with the supplied grease and bolt it to the bracket. It’s a good idea to check the torque on the bracket bolts too.Be sure to get the sleeves on both sides of the heim joint, between the mounting tabs so the joint can function properly.Everything back in place and looking good, except for that torn steering rack boot.