We kept the push-to-talk wiring tidy by zip-tying it to fire-system pull cable, already in place. No floppy wiring means less risk of failure.

For sprint racing, you can get away without having a radio communication system and a spotter at the other end. At least for a while. Sometimes you need someone to tell you when the green flag flies. For endurance racing, a radio system is a must. Hand signals will only get you so far, which is to say, not very.

We turned to NASA sponsor Sampson Racing Communications for a setup that would work for sprints and enduros and agreed on the company’s 5-watt “The Racer’s System” with an upgraded push-to-talk button, helmet cord and antenna.

Installation is reasonably straightforward, though we were glad to be close enough to Sampson’s shop that we could take the car over for the helmet and antenna installations and routing and cutting the cables, which is critical.

“When you’re installing an external antenna kit, make sure you follow the directions on how it gets run,” said Shawn Sampson, owner of Sampson Racing Communications. “No coiled loops zip-tied together. Don’t run the loom with power sources. Make sure you run the antenna kit from where it starts to where the radio is all by itself and separate. That’s one of the biggest things, so you don’t end up with electronic issues in your radio transmissions.

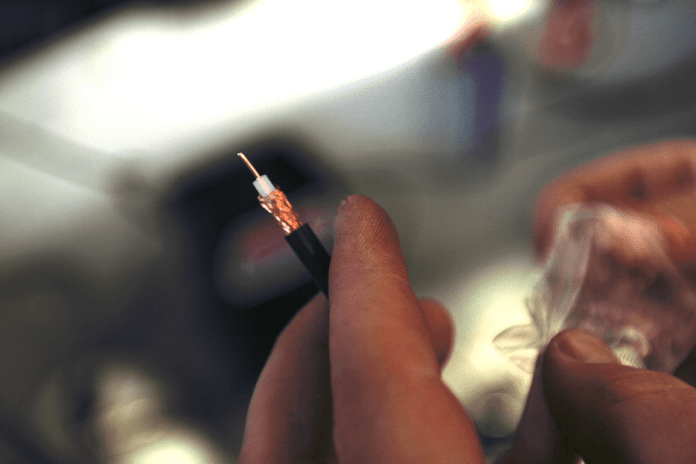
When you use an external antenna, buy only as much of the RG58 cable as you need to route it from the antenna to where the radio is mounted. If you loop any excess cable, it loops the energy essentially makes the loop the tip of the antenna, which makes for poor reception and transmission.

“Every kit that we sell we purposely ask the customer what kind of car they’re putting it into, whether it’s a sedan or an open-wheel car and where they’re going to mount the antenna kit,” Sampson said. “Even on our website, we tell folks they can order the coax in 2-, 4-, 6-, 8- and 12-foot lengths. That way we can make sure we cut it custom for the customer so they don’t have to deal with extra cable.

“If you loop it up, put zip ties on it and throw the extra coils underneath your seat, well your radio antenna just got mounted underneath your seat,” Sampson said with a chuckle.

Another key to good reception is to ensure your harness and loom are separate from all other electronics and power sources, such as battery cables. If you zip tie your radio cables to existing harnesses, you will get interference. An external antenna also gives you the freedom to mount the radio within in reach of the driver, where he or she can change channels and adjust volume.

Another key part of the system is the push-to-talk button and the coiled cord that mount to the steering wheel. You want any stretch as a result of turning the steering wheel to take place in the coiled portion, rather than tugging on the ends.

You also want to locate the jack that connects the driver’s helmet in a convenient spot. Attaching it to a roll cage or a seat is a good idea. That way, enduro crews can access it easily, as can a solo driver suiting up for a sprint race.

Installed properly, driver and crew should be able to communicate using a normal speaking voice. Sampson added that the microphones are designed to be used right on the lips. If the microphone is too far away, and even an inch is too far, the volume on the other end will suffer. Shouting won’t fix it either, because it just creates distortion. The driver should reach up into his helmet and press the microphone close to his lips. The crew chief needs to do the same with his headset and mic.

The next time you find yourself straining to see the starter’s flag, or are curious where the emergency vehicle is on track, you can just ask your spotter. You’ve got him on the radio.

Resources

http://www.sampsonracing.com

This photo has nothing to do with the radio installation, but it is something we discovered during the job. You can refurbish a matted suede steering wheel by lightly scuffing it with a rotating wire brush.
Drill and mount the push-to-talk button bracket and drill another hole for the zip tie that will hold the coiled cord.
Mount the button by tightening the nut on the back and secure the coiled cord to the bottom spoke. Sampson Racing Communications has a demo wheel done this way in its showroom.
From the back, you can see how everything attaches. We added a zip tie around the steering wheel extension.
We pulled the blanking plate from one of the unused factory switches and ran the wires from the push-to-talk button back behind the dash and around to the radio.
We drilled a hole in the blanking plate just large enough to push through the connector.
We gutted the back of the blanking plate to make the whole thing work because that is the part that clips into the dashboard.
After we sorted the connector and the plate, we pushed the wires through the hole and routed them behind the dash.
We wrapped the connector with a little gaffer tape to keep it from pulling through and reinstalled the blanking plate back in place for a nice finished look.
Here is how the installation of the push-to-talk system turned out. We wrapped the coiled cord once to keep it from bouncing off the driver’s left knee.
The radio mounting box comes with clamps to mount it to a roll cage, but there was nowhere to mount it on the cage where the driver could reach it, or where it wouldn’t be in harm’s way in the event of a collision. So we through-bolted it to the transmission tunnel.
Morgan Jerbiss of Sampson Racing Communications sands the paint off the inside of the quarter panel to get good contact for the remote antenna, which must be mounted to metal.
An upgrade from The Racer’s System, the UHF Phantom Elite antenna tip is sturdy and even aerodynamic.
Route the antenna cable on its own, away from power cables and wiring for other systems to avoid radio interference.
RG58 coaxial cable requires special tools for stripping and crimping. Measure out the length you need for your car and Sampson Racing Communications will send you the appropriate length with the connector installed. That way you won’t have to go to Radio Shack to buy the wire tools.
The RG58 cable gets connections from the wire at the core and the mesh beneath the casing.
We ran the antenna cable to the box and routed the helmet jack up under the package tray shelf and supported the cables with nylon stick-on adel clamps.
Morgan Jerbiss installs the microphone and ear bud jack in the helmet. He used a hot-glue gun to reattach the padding inside.
You can see the microphone on the flexible boom, which allows the driver the pull it in to touch his lips, which makes for the best sound quality and clarity.
Black nylon adel clamps and rivets keep the ear bud and helmet cord in place so connections during driver changes are easier and faster.
By attaching the helmet jack to the aluminum seat right at helmet level, it’s easy for a crew to connect it or a solo driver suiting up for a sprint race.
Image courtesy of Brett Becker

Join the Discussion